
The following steps will guide on how to add a Crystal Report to an existing or new remiCrystal Task:
- Open remiCrystal from the Windows Start Menu
- Click on the Reports & Actions tab
- Click on the Crystal Reports button
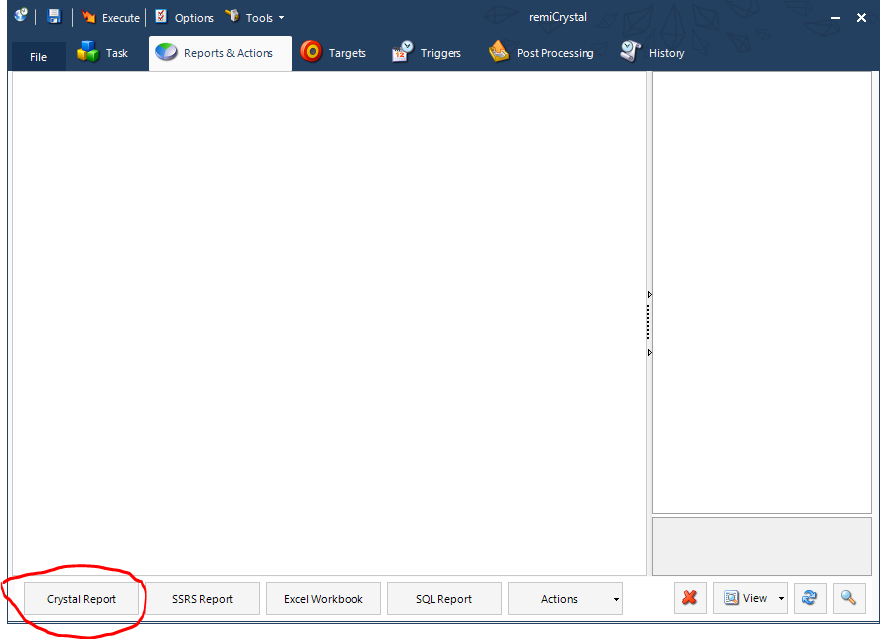
- Use the Windows file browser to locate your Crystal Report
- Once selected, you will be greeted with the Crystal Report configuration window with the following options. Starting with the Report tab:
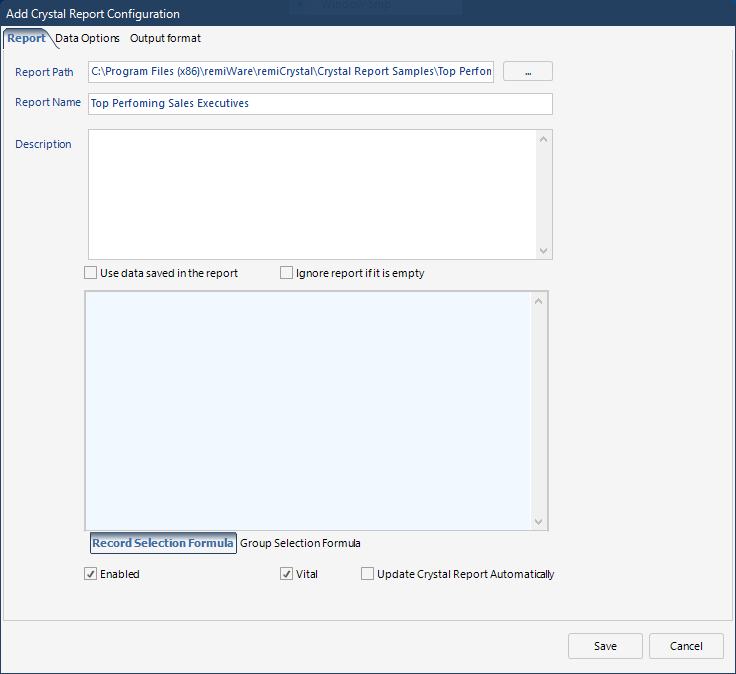
- Report Path: this is the path to the selected Crystal Report
- Report Name: this is the default report name and can be customized
- Description: you can provide a description for the report
- Use Data Saved in the Report: you can specify that, at runtime, the report uses data already saved in the report file
- Ignore Report if Empty: at run time, remiCrystal will check if the report contains data and if it doesn't will not export it to file.
- Vital: this option specifies that if the report errors, it will stop the entire task from proceeding
- Group/Record Selection Formulas: you can customize your Crystal Report formulas right from remiCrystal
- Update Crystal Report Automatically: when a Crystal Report is saved in remiCrystal, the software caches a version of it inside the task. This option allows remiCrystal to create a new cached version of the report prior to running it.
- The Data Options tab:
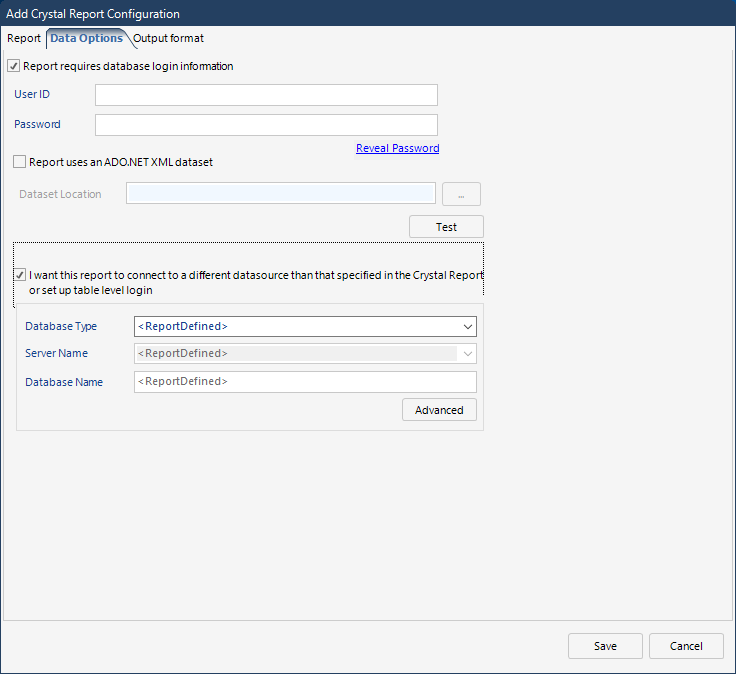
- Report requires database login information: this option allows you to specify the credentials that the Crystal Report will use to get data from the database
- Report uses an ADO.NET XML Dataset: if your report uses an ADO.NET XML dataset, you can specify the path to the XML file here
- Test Button: you can test the credentials you have specified using this button
- I want this report to connect to a different datasource...: if you would like to connect the Crystal Report to a different database than the one that was used during the report's design, you can specify the details here. The Advanced tab also allows you to specify database credentials individually for every table used in the report
- The Parameters tab is where you will the parameter values for your report:
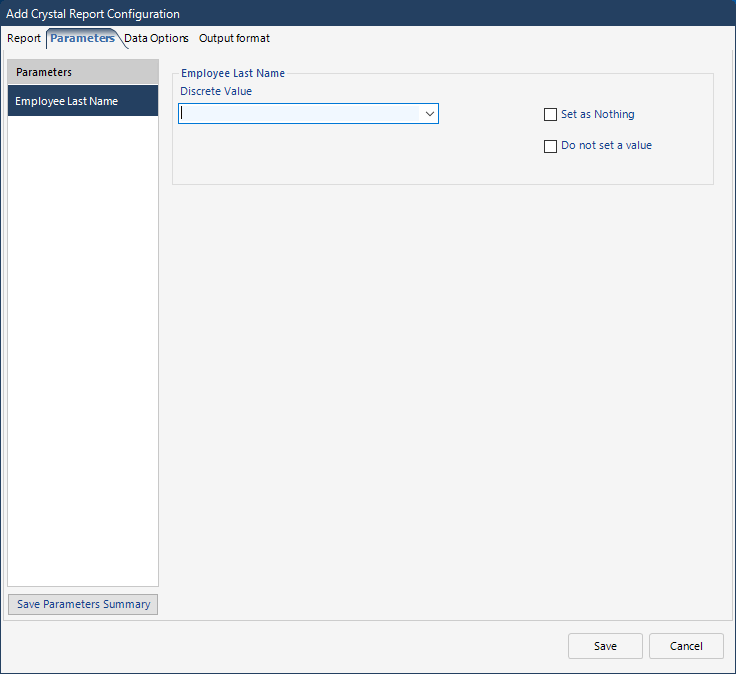
- Set as Nothing: this option will set the database value as Nothing or Null
- Do not set a value: the parameter will be ignored and will be set to the default value if one is specified in the report file.
- The Output tab is where you will configure the output file. You can select your desired output format as well as the output file name.
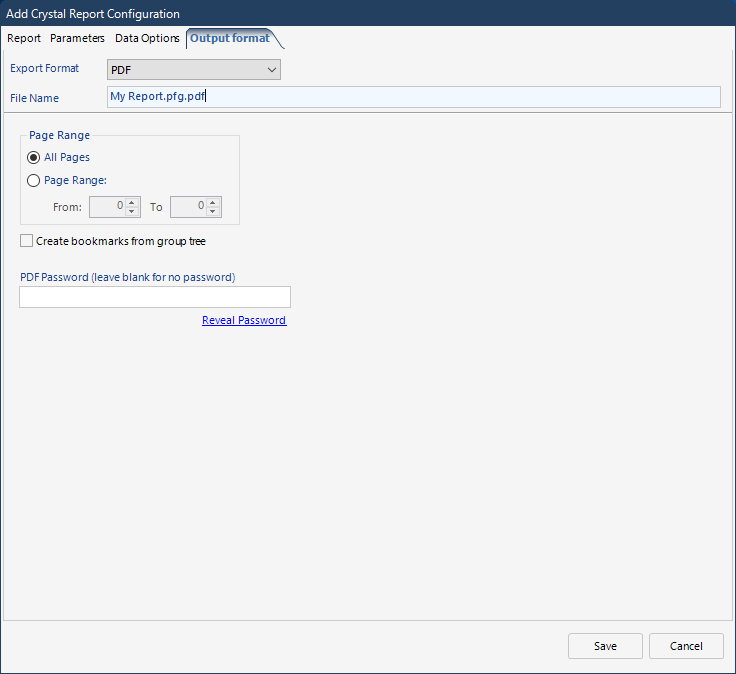
- Click the Save button to commit your Crystal Report configuration.
Comments
0 comments
Article is closed for comments.